Documentation | User Guide

Documentation | User Guide

Create payment locations

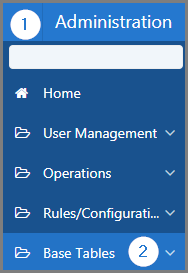
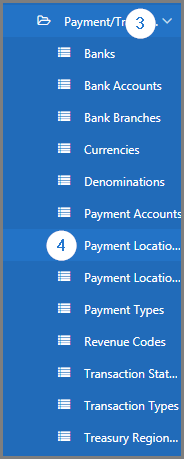
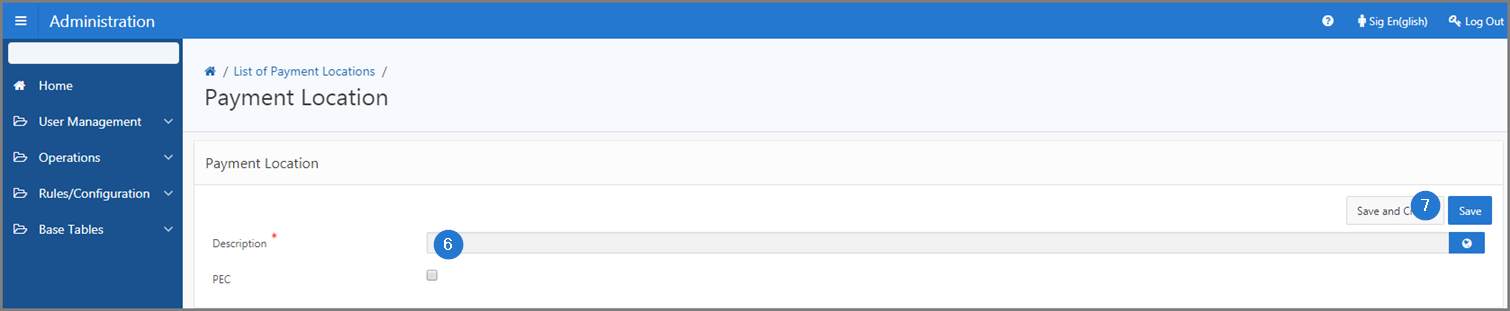
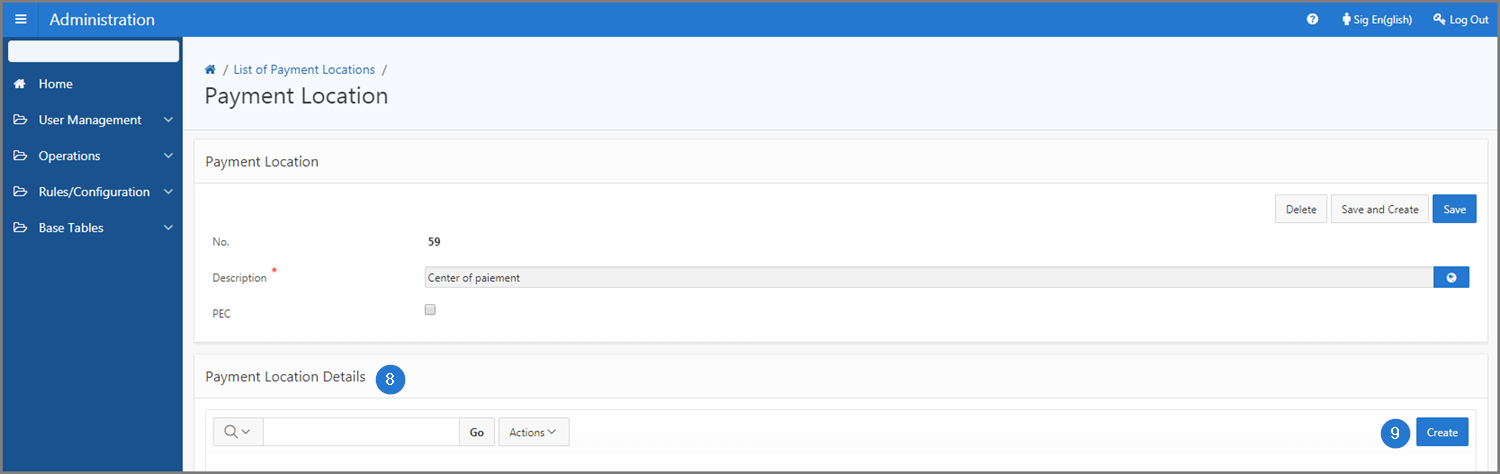
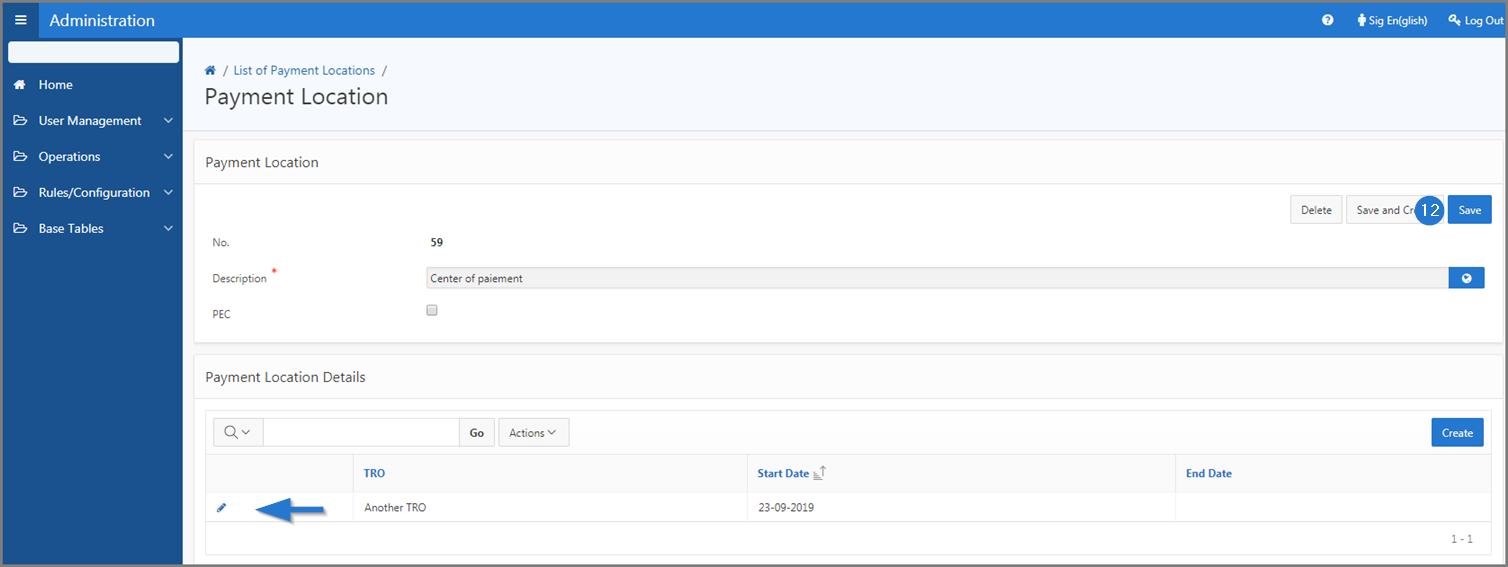
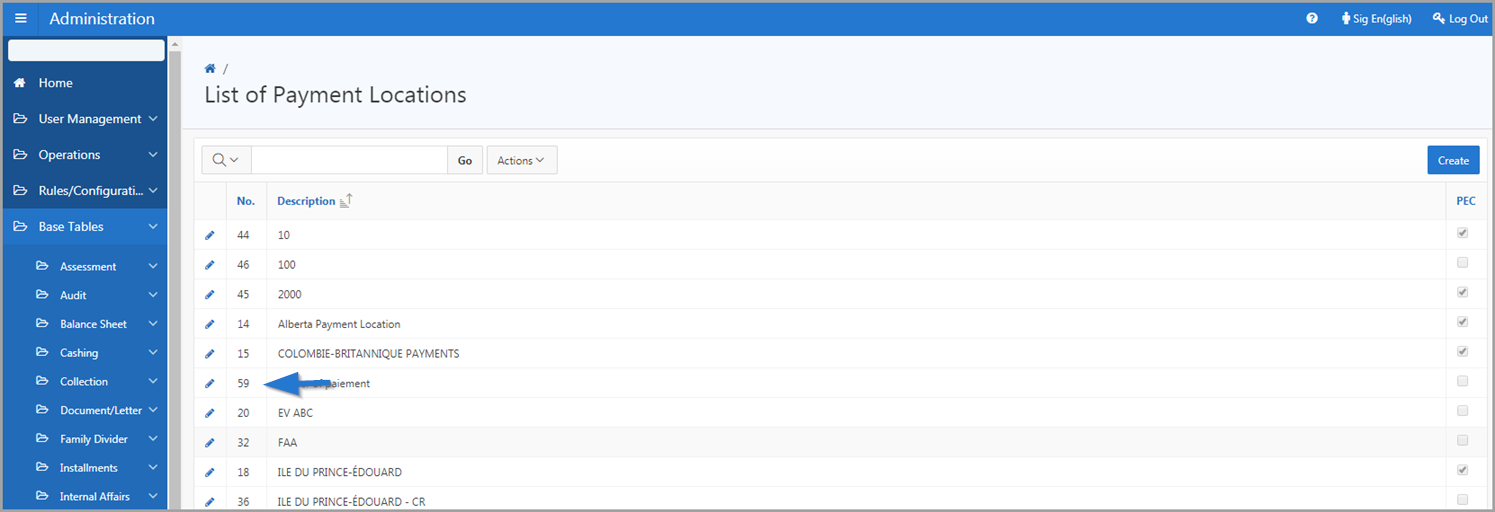
This part of the guide explains how to create a payment location.

SIGTAS allows the administrator to translate payment locations into the local language of his choice. When this is the case, a dynamic icon, located to the right of the field to be translated, indicates that a translation is possible. For further instructions, please click on the following link: Translate from the Translation popup window.

Step 1- Go to the page List of Payment Locations

  1. Go to the Administration module;
  2. Choose the Base Tables option;
  3. Select the Payment/Transaction option;
  4. Click on the Payment Locations menu. This action opens the List of Payment Locations page (509:16130);

Step 2 - Create a payment location

  1. Click the Create button. This action opens the Payment Location page (509:16131);
  2. Fill out the required fields (identified with a red star *). For example, Description, etc.;
  3. Click the Save button. This action confirms the creation of the payment location, assigns a location number and displays section to add details to the payment location;
  4. Go to Payment Location Details;
  5. Click the Create button. This action opens the Payment Location Detail popup window;
  6. Fil out the required fields (identified with a red star *). For example, Start Date, etc.;
  7. Click the Save button. This action confirms the addition of details to the payment location and redirects you to the Payment Location page (509:16131);
  8. Click the Save button. This action confirms the creation of the payment location and updates the List of Payment Locations page (509:16130).